Varmint Hunting Section
![]()

I am a member of the
Varmint Hunters Association and a Life member of the National Rifle Association. I like to
hunt, fish, play with the computer, and operate ham radio. I go
deer hunting and trout fishing every year and have gone to 3 of
the last 4 Squirrel Wars in Northern California. It is great
shooting there and it helps the farmers who are desperate to
control the overwhelming ground squirrel population. Since I
started calling for coyotes near Antioch, CA on two large
ranches, not a single cow or calf has been lost to the type of
predation as seen here.
I use a Contender carbine with Bullberry barrels chambered for a
17 Ackley Hornet, and a 17 Mach IV, for ground squirrels. My deer
and coyote rifle is a 243 Win on a 40 year old Sako Forrester
action with a Shilen barrel and a
"tight neck" chamber. For the big wild boars, my 7mm Rem Magnum
Wheatherby, is more effective.

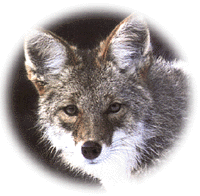
Coyotes can
cause
predationproblems for farmers.
More coyote information on coyote controlor Tim's
Coyote Links.
California ground squirrel information
hereand here.

Knit picking and improving accuracy.
A few years ago, you could shrink your groups 1/4" by just
subscribing to Precision
Shooting Magazine. In those days, there were good articles on
precision reloading in each issue. The magazine is still good,
but there are not as many good articles on reloading techniques
lately.
I started to get true accuracy when I began using the
Marquart outside neck turning tool to true up my cartridge case
necks. Neck turning provides a uniform neck wall thickness and
helps to center the bullet on the bore axis. It also sorts out
the cases that have large variations in wall thickness because
these poorer cases can be identified and you can toss them into
the bone pile.
Here is how I adjust the neck turning tool for my factory
chambered rifles that usually have 0.010 inches of neck
clearance. I pick out 10 new cases at random. Then, as I always
do even with new cases, neck size then so the neck will be tight
on the neck turning mandrill. The mandrill turns hard inside the
case neck even when there is no cutting action. A tight fitting
mandrill is the only way you can really make accurate cuts. I
adjust the depth of cut so it barely cuts any material and then
go through all 10 cases. Usually, there will be one or two cases
that clean up practically all the way around and a few that cut
heavily only on one side. I increase the depth of the cut a
slight amount and go through the 10 cases again. I continue this
process till about 75% of the cases cleanup about 80% to 90% of
the neck outside surface. That means I will reject 2 or 3 out of
10 cases to the bone pile. I keep that setting on the neck
turning tool and turn all the cases in that lot of brass. That is
it. No more neck turning for those cases. These turned cases will
improve accuracy by decreasing the group sizes approximately 50%
and get rid of most of the wild fliers.
For my rifles with tight necked custom chambers, I use
"fitted neck" cases. Once made, these "fitted neck" cases need no
resizing and all that is required for reloading is to clean the
primer pocket and clean the neck ID and reload. These rifles have
chambers neck diameters so small, I can't even chamber factory
ammunition. It took a while to figure out how to reliably make
"fitted neck" cases and it cost me quite a few good cases in the
process. The first step is to turn the necks on 3 or 4 cases so
that there is approximately 0.005 inches of neck clearance and
fire from them. Then, I carefully mike the neck diameter of the
fired cases and record this diameter. I call it the "spring back"
diameter. This diameter is actually the diameter the brass neck
will spring back from elastically after being forced against the
rifle chamber's neck diameter. The difference between the
chamber's neck diameter and this fire formed case neck "spring
back" diameter is usually about 0.0015 inch.
I then take another 4 or 5 cases and adjust the neck turning
tool so that the neck diameter (with the bullet seated) is the
same or 0.0001 inch larger than the "spring back" diameter above.
This takes some very careful adjustments on the neck turning
tool. This is a cut and try process. After the neck turning tool
is adjusted correctly, I load and fire the 5 cases and neck size
them and repeat the neck turning without changing the setting on
the Marquart tool. This final neck turning will usually take a
slight skimming cut of less than 0.0001 inch. I load the 5 cases
again without doing any resizing and fire them and then clean the
neck ID's with a brush and load them. I feel the neck tension by
the force it takes to seat the bullet. If there is ample neck
tension so that I can't pull the bullet out or seat it deeper
with my fingers, I have the correct setting. I make no further
adjustments to the neck turning tool. At this point I turn all
the cases in the lot without changing the turning tool setting. I
fire form the cases and take the final skimming cut. At this
point I have "fitted neck" cases for this custom rifle chamber.
These cases give me the optimum in accuracy for that particular
rifle. I never have to resize these cases again. If they start to
get sticky in the chamber (hard to open or close the bolt), I
reduce the load and check for accuracy. The cases should last
indefinitely, since they are only exposed to elastic stress
levels. Most cartridge cases fail because of stress levels that
cause plastic deformations. I have given up shooting MAX loads.
They burn out the barrels and don't give me the reliable accuracy
I require when the cross hair is on a critical target.
Some other points on the Marquart neck turning tool: I have
very carefully dressed the tool bit with a fine diamond hone so
that the cut on the outside of the neck looks like polished
brass. Another fine point is, that before I start neck turning or
after a delay, I put the Marquart tool in my pocket for 5 or 10
minutes to warm it to body temperature. Because of the
differences in thermal expansion between the materials of the
turning tool, the cold tool will cut about 0.0001 inch deeper
than when at body temperature! It stays warm from my hands as I
use it. I use a mixture of Butter Flavored Crisco and Teflon
Super Lube on the mandrill to prevent it from galling inside the
case neck. I have finally purchased tungsten carbide mandrills
for .17, .224, and 6mm and these really minimize galling of the
brass. I also polish the mandrills with Wenol Plus metal
polish.
Here is another accuracy aid. I purchased the Sinclair case
length measuring plugs for .17, .224, and 6mm. These tools are
very simple stainless steel cylinders turned to the bullet
diameter leaving a rim slightly less than the case neck OD. To
use, you merely drill through the primer pocket on a expendable
cartridge case and neck size it. Insert the Sinclair tool as if
it were a bullet, leaving it long and then chamber the case. The
tool will be pushed deeper into the case neck and when you
extract it, you can measure the chamber's case length with a dial
caliper. I usually find that the factory recommendations for case
length leave a 0.050 to 0.070 inch gap between the end of the
case and the actual length of the chamber. This is a safety
concern and you can get high pressures by forcing a long case
into a short chamber. But like everything else, if you want the
best accuracy, you can minimize this gap down to 0.005 in. and
still be safe. You will get better accuracy and much longer necks
than the factory recommendations specify. I have found, that
factory .234 Win brass, is already 0.050 inches too short and
there is no way to lengthen it. So, I have started forming .243's
from .244 Rem brass. The .244 brass is about 0.2 inches longer
than necessary and can be trimmed to fit the .243 Win chamber's
actual length.
All of this sounds like a lot of trouble to go through
compared to walking into a store and asking for a box of 30-30's,
but it makes a big difference in the confidence level of your
accuracy potential.
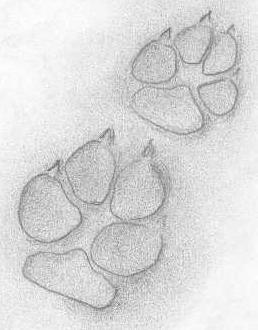

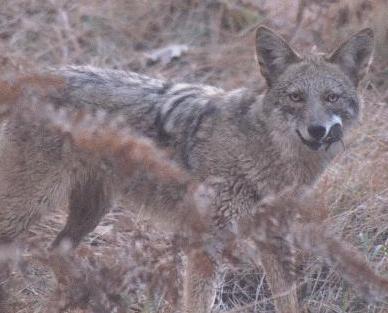
Coyotes not only eat
rodents, they cause serious
predationon cattle.

Some "HOW TO's" on coyote
calling
The sounds are poor quality, but the best I can do on the
computer
THE CALL.... My favorite call is the Woods Wise Vari-pitched
howler. You can get one from Wing Supply at 800-388-9464. It is
Model No. WW060. You can't make a decent coyote howl like this with it, but you can make
the most varied hurt jackrabbit to cotton
tail calls with it. Just by biting down on the two halves of
the mouth piece you can vary the pitch. Opening and closing your
hand around the end of the call is almost as important as the air
pressure on the mouth end. If you do it correctly, you can almost
feel the bobcat's teeth as he is biting down on the back of the
cotton tail. It can be loud or soft and with the most emotion of
any call I have used. A real winner. It does have one problem.
After about 30 minutes of use, the reed travels down the mouth
piece toward the exit of the call. Then it gets difficult to make
the soft whimpering sounds and takes about twice the air to use.
Just take the mouthpiece out and pry open from the exit end and
slide to reed to the front. I use the back of a pocket knife
blade (while it is closed) between the front of the two plastic
pieces that you bite on. This leverages it so you can move the
reed forward. It is hard to explain with words, but once you have
the call in your hand and see that the reed has moved, you will
figure out a way to move it forward.
My second favorite call is the Circle
Jackrabbit or Circle Cottontail
call. The jackrabbit call is loud! It can be raspy and have lots
of emotion. The cottontail call is not quite so loud, but I have
brought in coyotes from a mile away with it. Be sure to use you
hand around the end of the call, causing back-pressure and then
releasing the pressure. Opening and closing your hand around the
end of the call is almost as important as the air pressure on the
mouth end.
The Jonny
Stewart's PC-1 vari-pitched call is very good. It has a
rubber button that you can bite down on and a tiny teat of rubber
that clamps the metal reed. You can make all the jackrabbit and
cottontail pleading sounds with it. It is very good there, but
you can make it sound like a hurt coyote pup. That is where it
shines. You can duplicate the ki-yi high pitched sounds of a pup
being trounced by a big invading male coyote. This call is great
in the spring time or early summer when the pups are still young
and haven't left the home range.
The Dan Thompson
coyote howler call is the best howler I have used. I
can talk a pretty good "hurt rabbit", but when I talk "coyote", I
am not sure I am always using the correct message. I have not had
my best success with howling, but on 4 or 5 occasions, it worked
very well. A regular greeting howl sometimes works. Repeat it three
times, then wait a few minutes and then repeat. They will seldom
answer. If they do come in, it will usually be a slow and quiet
approach. You might be a much bigger coyote than they are! They
come in with caution, but not always. I once saw 4 coyotes
running across a flat area about a mile away. I tried the Circle
Jackrabbit call on them and there was absolutely no effect. I
gave three greeting howls and they tuned on a dime and started
trotting my way. I made no more calls and they continued toward
me. There were some bushes in front of me (bad situation). Well,
they never did stop. When the scope was full of fur, I missed one
and never got another shot. It happens that way some times! There
were four of them, and maybe that is why they came in so
fast.
Here is the challenge
bark. Repeat this in a series of threes or fours for
about a minute. I believe this tells any coyote around (in the
California dialect) that your are new in the territory and you
are going to take over. This is an invitation to fight. You won't
bring in many females or young males with this call.
Finally, the mouth diaphragm calls are very good. They take
the most work of all. You really have to use air pressure and
lots of diaphragm control to make them sound correctly. I used to
play a bassoon in the 8th Army Band in Seoul, Korea and it is as
hard as playing the bassoon to get the most out of them. Again,
the standard predator diaphragms will make the jackrabbit and
cottontail sounds. If you get a standard hen turkey call, you can
make a great hurt coyote pup
call. The hurt pup call works, even in areas where
lots of calling has been done and there are no virgin ears
around.
CALLING.... I like to start the calling with a medium volume.
While calling, picture in your mind's eye a cottontail just being
caught by a bobcat. The cat takes a bite on its shoulders. It is
surprised and suddenly starts urgent screams. After a few
screams, the cat relaxes a bit and the urgency decreases to a
whimper. The whimpers have a quivering, crying, pleading sound.
Then another bite and it hurts. Urgency again and the rabbit is
getting weaker. Then the cat starts biting off chunks and the
urgency is there, but the strength is going and more quivering.
If the coyote out there doesn't get here pretty quick, there will
be nothing left to eat! Now the screams are slower and weaker,
almost like moaning. Visualize your calling. It makes for much
more believable sounds. The same thing applies if you are doing
the hurt coyote pup call. Watch that big male coyote take a bite
and the pup cowers and screams and whimpers.
CALLING DURATION.... My calling sequences take about 5
minutes till the rabbit is just about dead. If it is a really
good location, I will revive the rabbit for another 3-4 minute
sequence. Then I sit there for at least another 15 minutes. I
have had some "walk-in" coyotes. They know where the sound was
coming from, but they were in no hurry. When you finally feel
nothing is coming and are ready to quit, stand up at the alert. A
coyote could be sitting where you can't see him and then he will
show himself. Do a complete 360 degree scan before you really
give up.
WATCH THE TRAILS.... Where is the coyote going to come from?
Coyotes like a quiet approach. Using the tails is easiest and
makes the least noise. Busting through the brush or tall grass
makes the most noise. Look for them to come in on a trail or an
old road. They will most often use the line of least resistance.
I hunted near a large lake a couple of years ago. On each
drainage to the lake I would check the dry wash for a trail. If
there was a well established trail, it was easy. I would make a
stand where I could see about 100 to 200 yards of the trail.
Start calling up the canyon and watch the trail. Got two coyotes
at that lake coming down the trails. Called in a third one to
within 20 feet of me on the inlet stream bed and never got a
chance for a shot. I didn't follow my own 100-200 yard
recommendation!
INDICATORS.... Watch and listen for indicators that a coyote
is approaching. Out here in the west, one of the best indicators
is the ground squirrel. If they see a coyote, they will give a
warning burst of chirps and then continue will single chirps
about every 2 seconds. If you can see the squirrel, the way he is
standing will be an indication of the direction of the coyote.
The squirrel will be positioned so either the right or left
profile will be facing the coyote. Remember, eyes to the sides,
prey and eyes facing forward, predator. Squirrels eyes are
designed for 360° viewing.
Another good indicator is deer. I was once calling when a
spike buck stepped out in the open about 250 yards up wind. He
watched me call for about 5 minutes, then turned his head to the
side for a few seconds and then quickly bolted out of sight. From
behind the direction he ran, two coyotes appeared. I got one, and
almost got the second. Just wasn't fast enough with the bolt.
Cattle also make good indicators. While you are calling, they
should be looking at you. If they start looking in another
direction, there is probably a coyote coming in from that
direction. I was calling from under a oak tree and there were
about a dozen cows on the far hillside at about 200 yards. All of
a sudden, the cows spooked and sure enough there was a coyote on
the hillside in the thick trees. I played peek a boo with that
coyote for about 15 minutes. I could tell he was there, but he
wouldn't show himself, and wouldn't leave. I was using the hurt
pup call and giving the ki-yi's at about 2 minute intervals. I
could catch glimpses of him between the trees. Finally he stopped
for about 3 seconds in a 2 foot clearing. That's all it
took.
Listen for birds too. Birds in the tree tops will often
harass a moving coyote. If you see a bunch of birds fly off all a
sudden, that is an indicator. Often crows will circle you while
you are calling. Watch to see if they circle another area. There
could be a coyote there.
GETTING CLOSER.... You are calling and you see a coyote
coming in, what do you do? This is a tough one. If I am actually
blowing on the call and I see a coyote on a fast approach, I have
a tendency to stop calling in mid scream and drop the call in the
dirt and move the rifle toward him. Most of those times didn't
work very well. The coyote saw me, too! On my cooler moments, I
whimper off the calling (rather quickly), then sit still while
the coyote is still coming in. Remember, while he is getting
closer, your chances are getting better. Also, it takes about a
minute to really get fully pumped full of adrenaline and to make
it practically impossible to hold the rifle steady! ;-) Try to
wait till he goes behind something or is watching where he is
running. Then, get your rifle lined up. A standing shot at 250
yards is much easier for me than a 50 yard running shot at 45
degrees quartering away. Try to wait for a standing shot. When
they stop closer than about 75 yards out and look at you, you
will usually have about 1-2 seconds to do the deed. Practice the
fast trigger squeeze on some of the closer ground hogs or ground
squirrels.
THE STAND.... Walk into the wind to set up your stand if
possible. Sit in front of some object to break up your outline. I
have had coyotes come very close, even when I am out in the open
with no cammo or backdrop. Coyotes see things, but they are not
sure what they are looking at. Coyotes smell you and they know
instantly and exactly that you are danger and vacate fast! Pick a
location where you can see out to 100 or more yards in front of
you and to the sides, if possible. If you call where there is no
clear view of the coyotes approach, they will come in and you
won't see a thing. You will only have made another wise coyote!
That coyote will probably never come to your call again. Next
time, his refusal to come to the call will also alert any other
coyote with him to avoid your call. If there is some cover or
bush right in front of you, any coyote that comes in will use
that cover and stay behind it where it can't be seen. Sit in
front of the bush to avoid this, if possible.
HUNTING PARTNER.... Place your hunting partner to the left or
right, where he can see behind you (down wind). If you are near
the bottom of a canyon, you can call from up one side and your
partner can sit on the other side where he can see above you. The
idea is to pick a place where your partner can watch the coyotes
approach you, even if you can't see them. I have done most of my
hunting solo. You can do a very good job by yourself, but there
will be some coyotes that will circle and sneak up on you from
downwind and then leave and you won't have any idea that they are
there.
HUNTING WEATHER.... This is easy. Go hunting every chance you
get. You will have a difficult time calling when the wind is much
stronger than 10 MPH. You can't be heard very far up wind, and
downwind has your scent splattered all over the place. I haven't
tried much calling in the rain. I will leave that for the more
hardy/dedicated hunters to discuss.
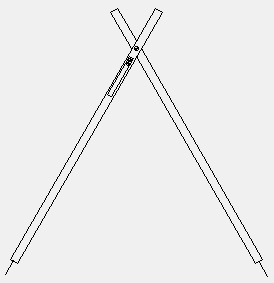
Bi-Fur-Pod
RIFLE SUPPORT.... I think I would almost rather be without
ammo than without my "Bi-Fur-Pod" shooting sticks. When I sight
on a target while resting the rifle on my Bi-Fur-Pod, I have
steady confidence that I am going to hit the target. I first put
sheepskin on the area where the rifle rests and that is how it
got its name. Have you ever noticed how often "fur" is mentioned
around hunting camps? The sheepskin wore out and I replaced it
with leather, but the name
remains. My Bi-Fur-Pod is a very simple tool. It fulfills a number of
functions.
- Rifle support while taking setting shots (main function).
- Open it up into one long stick and it is a unipod (formally it had a furry
middle) for standing shots. In 1994, I got a nice 2x4 Mule Deer in Northern
California's X3B Zone using the unipod.
- As the old age creeps up on me, it makes a wonderful walking stick on the
steep hillsides.
- The top of the Bi-Fur-Pod makes a great rest for my binoculars while I am
setting and spotting for distant coyotes or that trophy buck.
- More than once, I have pushed a rattle snake out of the way with
it.
The sticks are 5/8" square wood 36" long. Round sticks do not work well. The
1/4" pivot bolt is 5-1/4" from the end. Tighten the bolt so that there is a
reasonable amount of friction between the sticks and they will hold their open
or closed position. Two large nails with the heads hack sawed off are epoxyed
into the ends with 2" of nail exposed. If you use shorter nails, they won't
stick in the ground very well. I took an old stainless steel spoon and flattened
it out and trimmed it to shape to make a carrying clip. When I am walking, I can
carry it by sliding the clip on my belt. For a finishing touch and so you won't
scratch the forearm of your rifle, epoxy leather strips on the inside of the top
"V". The Bi-Fur-Pod is a lot handier for me than the Harris Bipod. You can't use
the Harris Bipod for items 2-5.
CAMMO.... Well, here is where I am going to disagree with the real pros! I
gave up wearing cammo while I am hunting. I buy my clothes from Gander Mountain
or Cabela's and they are dull, greens, browns, and gray. I don't want to look
like a militia freak wearing full cammo to and from hunting. My heavy coat is
cammo, and my hat is cammo, but that's it. With my "blend into a crowd cammo", I
have called coyotes right up to me. Most of the time I see coyote and deer
before they see me. That's a good test of your stealth and color selection. But,
here is where I go overboard. I paint my rifle and bi-fur-pod cammo! Yes, my
pretty rifle with the fancy French Walnut stock (some fiddle back) and the
stainless steel Shilen barrel are painted with permanent cammo paint. The shine
off a rifle barrel is the most obvious indicator to a critter that something bad
is out there. Have you noticed that you can spot hunters miles away, just from
the flash of sunlight off the rifle barrel. Cammo paint stops that! One of my
hunting partners had a beautiful Browning 30-06 Semi-Auto and I told him he
should paint it. It shined like a diamond up a goats ass. Well, we were deer
hunting and I jumped a nice Black Tail and it headed his way. I called him on a
handheld ham radio (we are both ham radio operators) and told him a buck was
coming his way. He was 500 yards away, and I could see the flash off his barrel.
That Black Tail went over the hill away from me heading toward my partner. About
5 minutes later, the buck came over another hill off to the side running away
from the barrel flashes. A nice neck shot and the hunt was over. The next day my
partner wanted to know where to get cammo paint.
BUSINESS CARD.... I have made my "Varmint Hunting" business cards using
AutoSketch. There is a slimmed down version of it at the top of this page. Don't
be timid with your words. When you walk up to a farmer and ask him if he would
like your help with his predator and varmint problems, it works wonders to hand
him your card! The "fly-by-night" hunter-plinkers the farmer has seen in the
past, don't hand out business cards. If you have the tools, make yourself a
varmint hunting business card. It is well worth the time. I also get the
farmer's address and write him, giving hunting reports on my visits to his land.
My ring of paddle lock keys to farmer's gates is steadly growing too. .
MORE TO COME....
ELECTRONIC CALLS....
WHAT CALIBER....
WHAT
SCOPE....
DEER CALLING....
DEER HUNTING....
DEER HUNTING
STORIES....
WILD PIG HUNTING....
WILD PIG HUNTING STORIES....

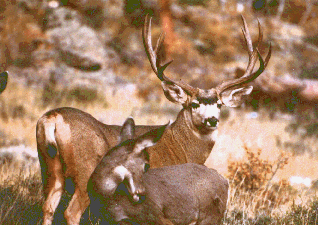
Odocoileus Hemionus


![]()
![]()

![]()


![]()

![]()

![]()
![]()